The Seadoo Challenger 2000 sport boat ("C2K") was produced from 2000-2005. It is considered by many (especially those who own one) to be one of Seadoo's best full sized watercraft. To address the popularity of wakeboarding and other board-based sports, Seadoo released a version of the C2K called the X-20 that included a factory wakeboard tower. The two sister models were in production side by side for several years until Seadoo stopped producing boats with Mercury SportJet engines.
What if you're a C2K owner, perfectly happy with your boat, but you would like a wakeboard tower as well? It's hardly economical to switch boats just to get a wakeboard tower. It's not necessary, either, since there exists a large aftermarket of tower manufacturers who make everything from one-size-fits-most units to full custom towers based on measurements taken from the boat in question.
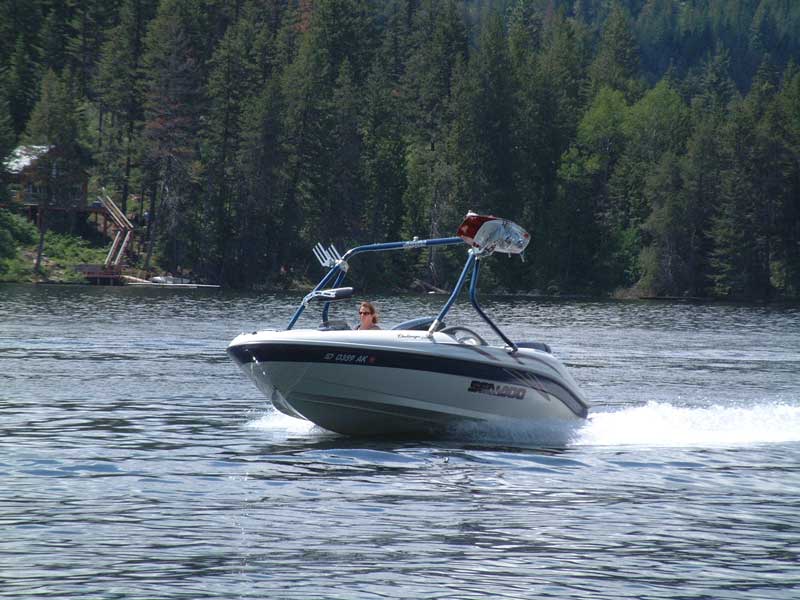
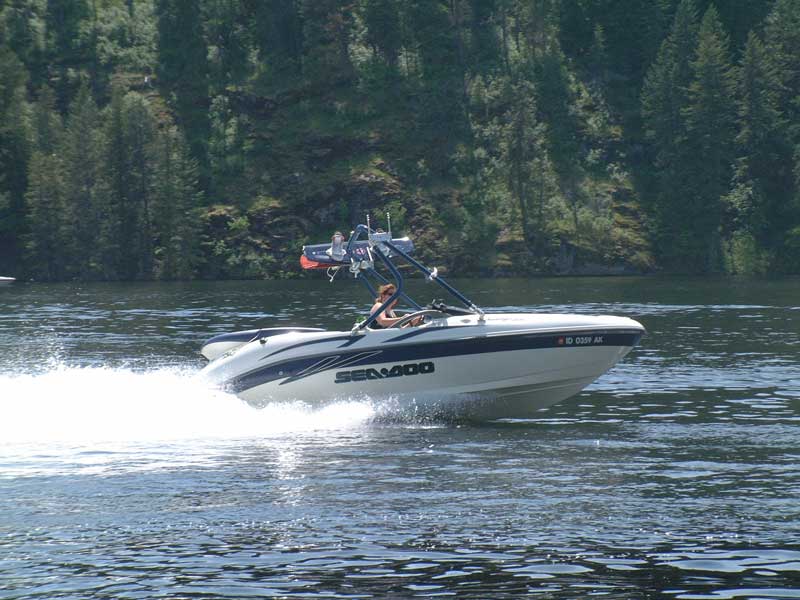
We've had our 2001 C2K for several years now as its second owner. Last year we started getting into wakeboarding, and while the boat's factory pylon was fine for learning the basics we wanted a tower for its higher tow point. This led me to research aftermarket towers that would work well, and look good, on the C2K.I'm an Engineer by profession, so I look at everything from a technical perspective. The biggest consideration when installing a tower on a boat is stress. Having the tow point up high, distant from its mounting points on the hull, gives the tower tremendous mechanical leverage. That leverage is transferred to the hull through the tower's mounting points, one at the end of each tube, where it becomes stress on the fiberglass.
Stress is your enemy when it comes to boats and fiberglass. It can cause cracking of the gelcoat (aptly named "stress cracking" or sometimes "spider cracking"). In more severe cases it can develop cracks in the core material itself, which can then permit water intrusion and eventually lead to structural failure even above the waterline.
Given the above, it's clear that a major consideration of tower selection - and installation - is stress management with respect to the hull. If we presume that the amount of stress is a constant, the issue becomes how to dissipate that stress with the least effect on the fiberglass. This quickly becomes a question of the size of the mounting bases and their backing plates. The larger the mounting bases and backing plates, the greater the surface area over which the stress can be dissipated.
Another consideration is hull thickness. Most dedicated wakeboard boats have thicker hull material in the areas where the tower is attached. Since non-wakeboard boats aren't made with towers in mind, we should do something to strengthen those areas. Some tower manufacturers actually recommend adding layers of glass and epoxy to simulate the thicker material that wakeboard boats already have. I chose a different approach that is less messy and likely even stronger, as we shall soon see.
The first job is selecting a tower. Monster is a tower company that gets lots of good press and reviews. I nearly bought one of their towers based solely on this excellent reputation for quality and customer service. Just prior to ordering one I went to a local dealer who had one assembled, and as an Engineer I was bothered by their mounting bases. They're only 2x3 inches and connect to the tubes via Heim joints that appear to be about 1/4 inch diameter. That's a lot of stress on a 1/4 inch bolt, which is then transferred to just 6 square inches of fiberglass.
It's understandable why aftermarket tower manufacturers use Heim joints. They provide freedom of movement in multiple axes, critical for matching the various angles found on the hulls and decks of all the various boats out there. Remember, aftermarket towers are trying to be compatible with as wide a variety as possible. They cannot cut custom hardware for every order and still maintain reasonable prices. Heim joints are a decent solution to that problem, but they just didn't instill a lot confidence in me.
So I started researching every brand I could find. There are about 6-8 decent brands out there. I narrowed it down to Monster, LoudLiquid, and Joystick. I called all three. Monster never answered the phone, never returned my messages, and replied to just one email. LoudLiquid was great on the phone. So was Joystick, plus Ron at Joystick was fast on emails and gave me his personal cell number if I had more questions. That narrowed it down to LoudLiquid and Joystick. Finally, I went with Joystick primarily because of their larger and very rugged mounting hardware. LoudLiquid uses Heim joints just like Monster, whereas Joystick machines their own parts from aluminum. The Joystick bases are 2x4 inches (8 square inches), which I backed up with 5x8 pieces of marine plywood behind the fiberglass to absolutely minimize the stress transferred to the hull. (More on my backing plates later.)
All of this analysis was done without considering price. After choosing Joystick, I was delighted to find out that they were the least expensive and had numerous powdercoat color options at no charge. And frankly, they are the best looking tower in my opinion.
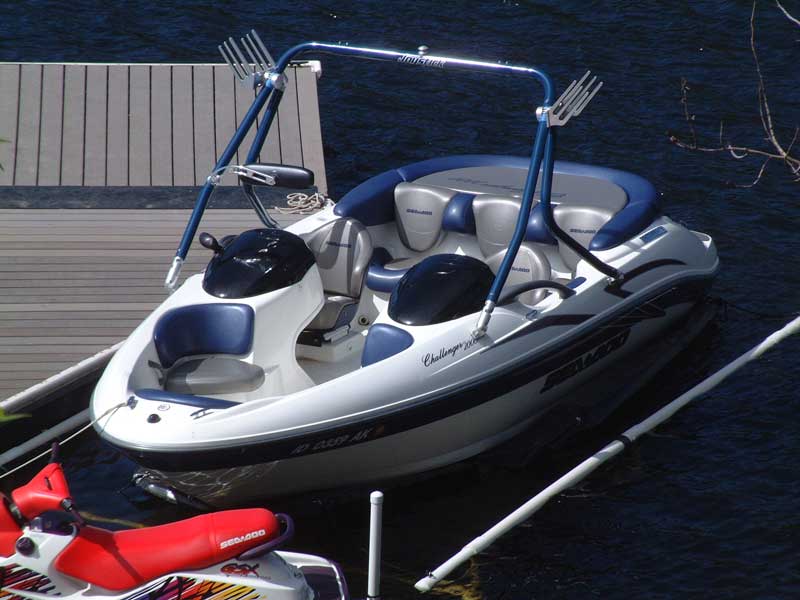
Ron at Joystick was kind enough to send me some photos of their blue color installed on a boat. The match looked close enough to my blue trim and upholstery, so I ordered the blue along with two brushed finish wakeboard racks. (I would have ordered a mirror mount too, but Joystick currently doesn't make one of their own.)
The rack arrived in a few days via UPS. When I opened this box this is what I saw:
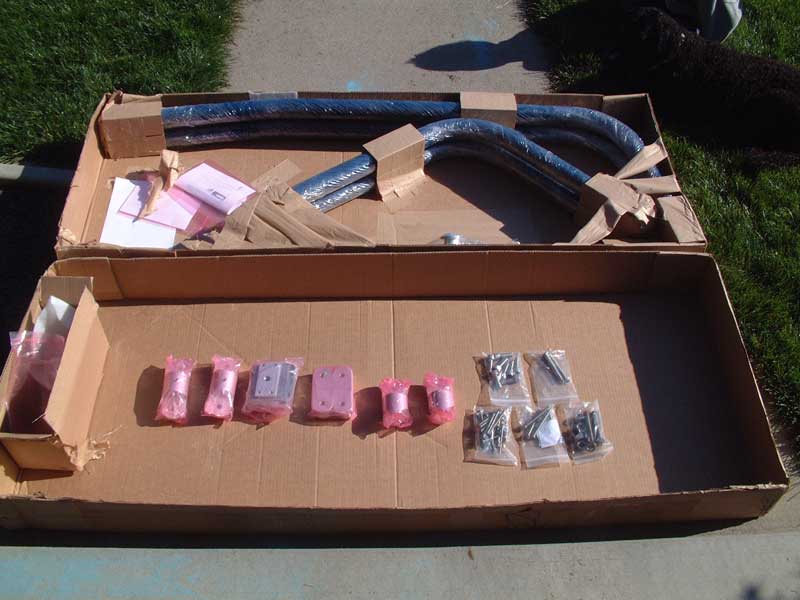
The tower was packed very well. Each tube was wrapped in plastic, and all the hardware was individually packaged and then packed into a separate box, which was then taped into the overall shipping box. Everything arrived in perfect condition.
The first step was to read Joystick's instructions. These are pretty good, and familiarize you with the tower's design. However, one of the reasons for this article is to share some additional recommendations and ideas that can help your installation go smoothly. No single set of instructions can be 100% complete, so I suggest reading everything you can on the topic and thinking about it a while before you start drilling holes in your boat.
Remember the discussion about stress management, above? It's time to revisit that. Joystick's larger mounting bases are a step in the right direction. However, that's still just eight square inches per tower leg. I wanted to distribute the force across an even larger region of fiberglass. So instead of relying solely on Joystick's hardware, I decided to make my own 5x8 backing plates... a full 40 square inches of surface area at each mounting point.
The challenge of larger backing plates is two fold: 1) What material to use, and 2) how to affix them to the inside of the hull. With respect to material, you need something very stiff and very strong that can still be worked with normal tools and will survive in a moist application. There's an obvious choice: Marine plywood. Marine plywood comes in various thicknesses, with 1/2 and 3/4 inch being readily available at specialty wood stores. I purchased a quarter sheet which allowed me to make two full sets of plates with plenty of material to spare.
Marine plywood has two major advantages over regular plywood. First, it uses marine-rated adhesives to glue the plies together. This means the plywood is far less likely to delaminate with exposure to moisture. Second, marine plywood has no voids. Plywood is assembled from multiple layers, or plies, of thin wood. Since there are multiple layers, a "hole" or thin spot in one of the layers isn't likely to line up with a similarly thin spot in other layers so thin spots, or outright holes, are permitted in regular plywood. Marine plywood has no such voids - it is solid everywhere, and therefore stronger everywhere.
Regarding affixing the backing plates to the inside of the hull, think about the fact that the hull is not flat inside or out. There's almost always some amount of curvature in at least one axis (usually two). Furthermore, the inside surface of chopper-gun fiberglass is rough with high and low spots. Screwing down a flat backing plate to a concave surface would yield contact only at the edges of the backing plate - actually concentrating the stress at the edges and literally making things worse. The larger the backing plate, or the more curved the hull, the more pronounced this effect becomes until at the extreme the backing plate would only contact at its corners, completely defeating their intended purpose.
My solution was two fold. First, I cut the corners of the backing plates to help them "settle down" into the concave hull surface. Second, I filled in the void between the center area of the backing plates and the hull with a fiber-reinforced auto epoxy. I selected Evercoat FiberTech. This material is sort of like "Bondo" but much stronger and water tolerant, and is available at any auto body supply house.
As a final step in my quest for the best possible solution, I coated all surfaces (both sides and all edges) of the backing plates with marine epoxy. In addition to the marine plywood's already better accommodation of moist environments, this helps to completely seal out water and protect the plywood from rot, mildew, etc.
At last, we were ready to begin installation. The first step is to figure out where the mounting bases will be located on your hull. Joystick's instructions cover this very well. Take your time and consider things such as whether the tower legs will interfere with passenger boarding, the opening of storage compartments or windshield sections, accessibility to the inside surface of the hull, etc.
On my C2K, I can open the windshields on either side and gain direct access to the inside of the hull. Likewise, removing the factory speakers mounted behind the main seats on either side yields access to the inside of the hull in that region. By moving the mounting points around a little I was able to optimize for physical convenience and installation access.
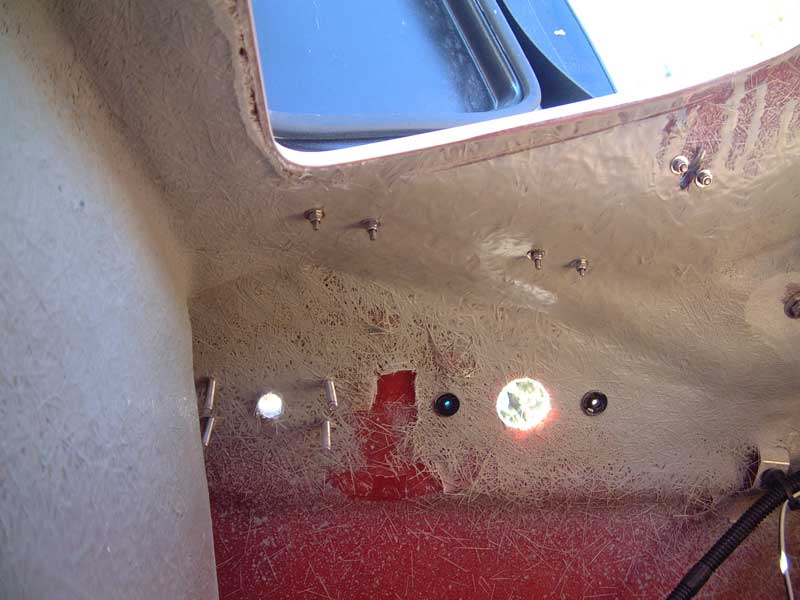
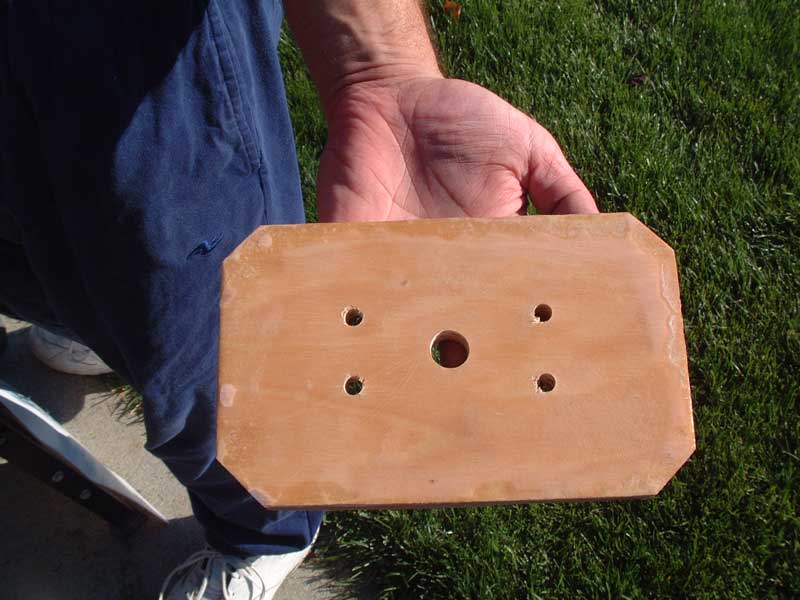
My first mounting point was on the driver's (starboard) side, under the windshield, just in front of the horn. The horn was close enough that I decided to temporarily remove it for better access. Here is the result:
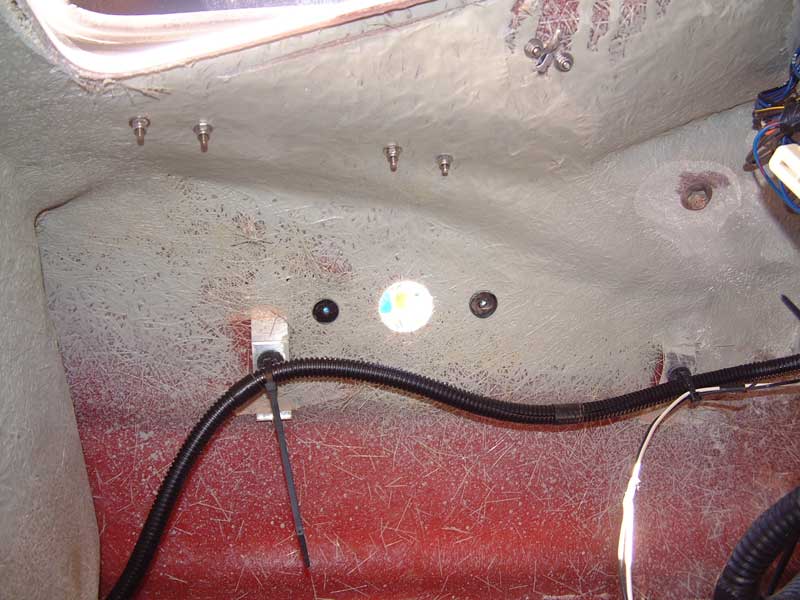
The big hole is where the horn emits its sound through the hull. The two little grommeted holes are where the screws hold the horn in place.
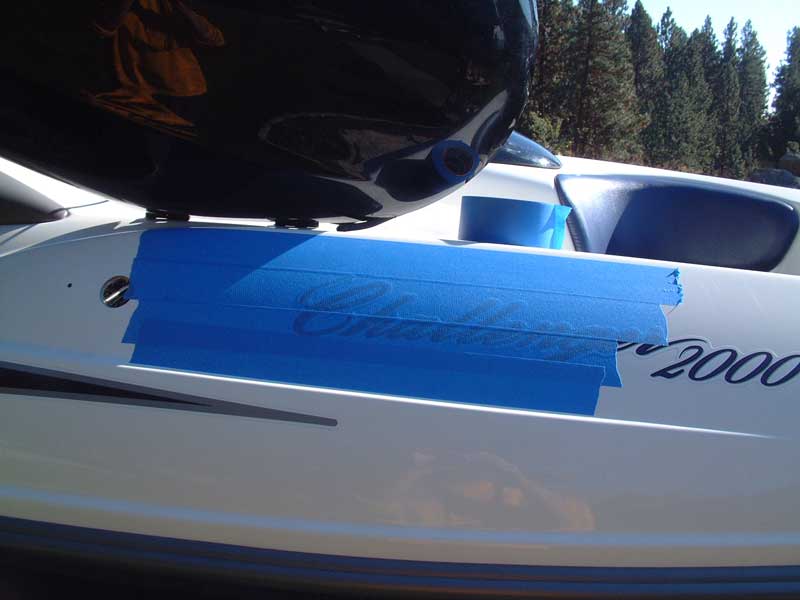
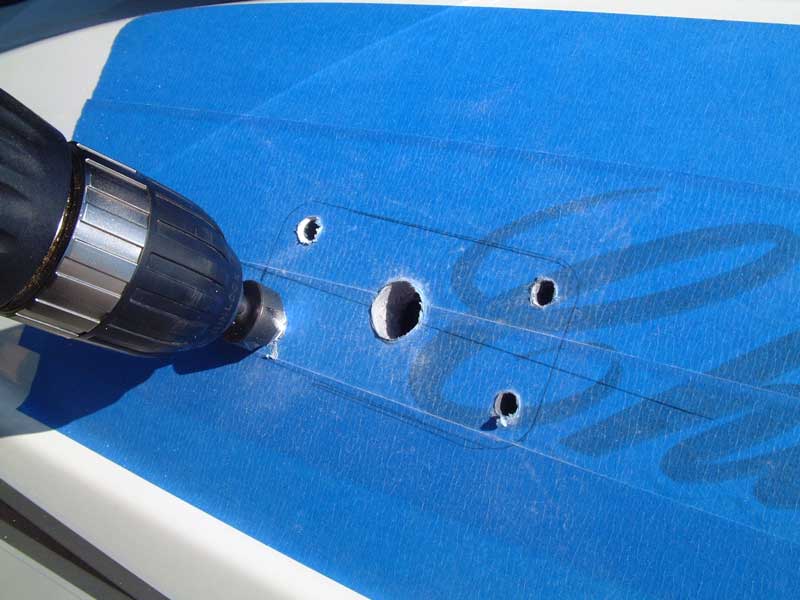
Next, I taped the hull in the area where the first mounting base would be located (and where my first holes would be drilled). This prevents nicks and scratches while you're working in that area. The horn's holes are clearly visible to the left of the blue masking tape:
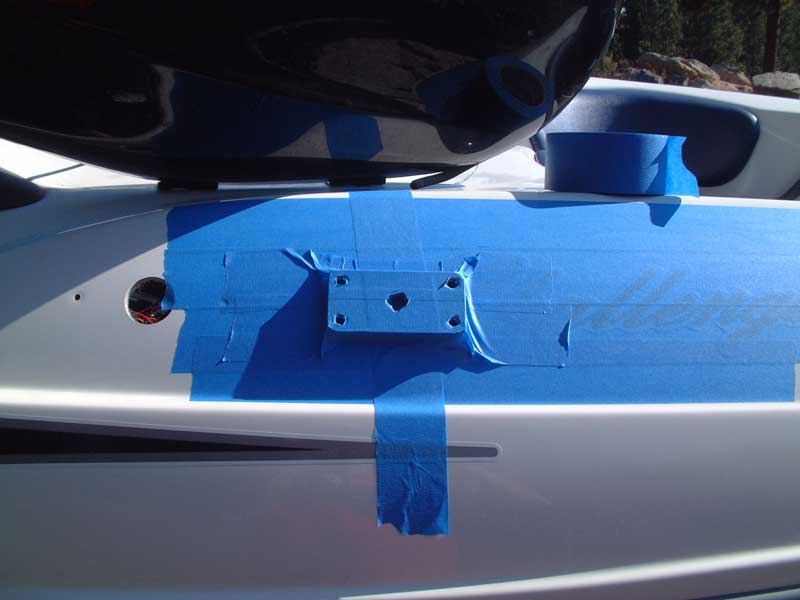
Some tower instructions tell you to mark the hole locations with pencil and then drill them out. I decided to use the mounting bases themselves as drilling guides, to absolutely eliminate any possibility of holes being in the wrong place or at the wrong angle. So after very carefully placing and orienting the base, I taped it into place:
Now I was ready to drill the first hole. Fiberglass is notoriously difficult to cleanly drill through, so I didn't skimp on this step. I purchased brand new black oxide twist drill bits so I'd have clean cutting edges and kept the bits clean while drilling.
Also - and I cannot emphasize this point strongly enough - be absolutely certain to run the drill bits in reverse while drilling fiberglass. Forward drilling will allow the bit's sharp leading edges to catch in, and chip, the gelcoat leaving you with an ugly, torn up edge that is exceedingly prone to cracking. Reverse drilling is more of a "wear it away" process that takes a lot longer but yields a much better hole in the gelcoat.
Another trick I learned while doing this: Start with small drill bits and work your way up, always running them in reverse. To be sure each hole was centered, I'd first use the full sized bit to create an indent. Look carefully in the center hole of this mounting base:
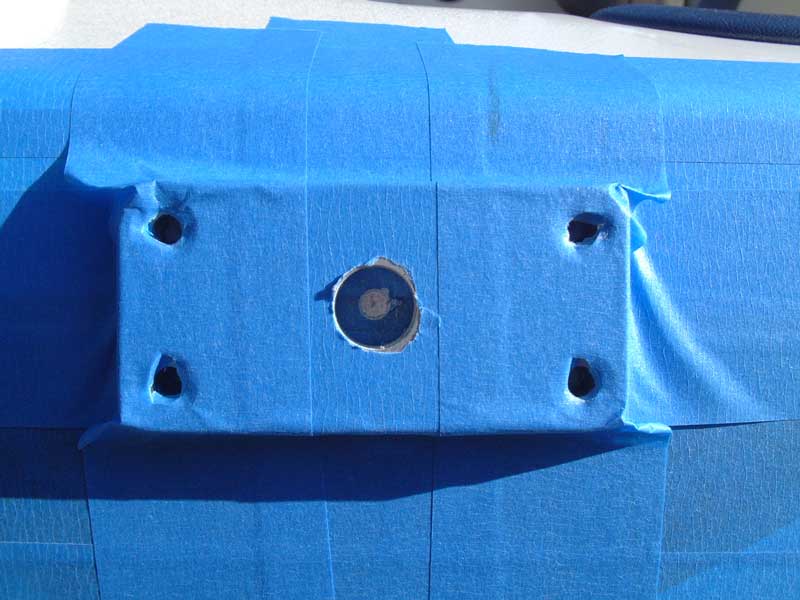
That little white spot is where the full sized bit had started cutting into the gelcoat. It's guaranteed to be dead-center. Then switch to a small bit and reverse-drill out the center of the hole. That hole acts as the center for a slightly larger drill bit, and so on until you reach the full sized bit. This is a slow process, so be patient. Let the bits slowly wear away the fiberglass. The longer you take, and the less pressure you put on the bits, the better your results will be.
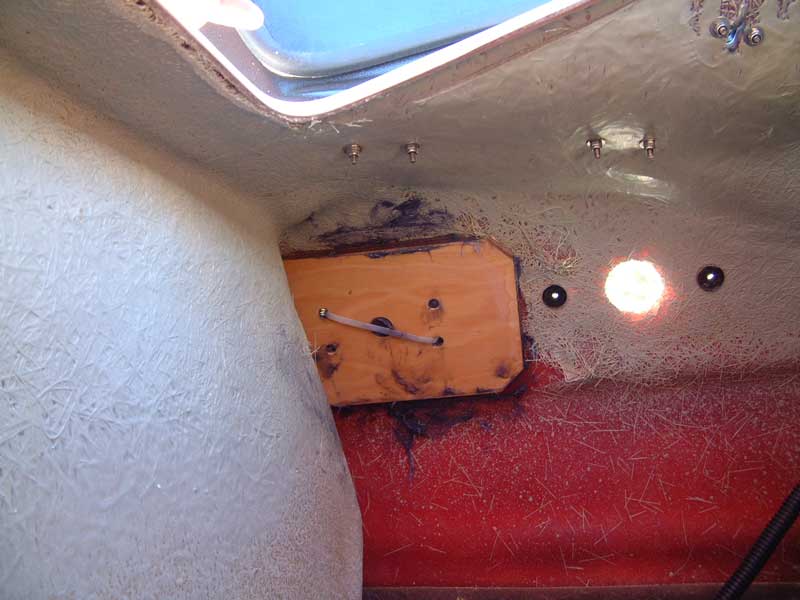
As each hole was drilled out (I recommend doing the side holes first and the center hole last), I inserted the appropriate bolt. This helped hold the mounting base in place while I drilled the next hole, insuring that everything stayed straight and lined up. Here's an inside view of the first hole with its bolt inserted through the mounting base:

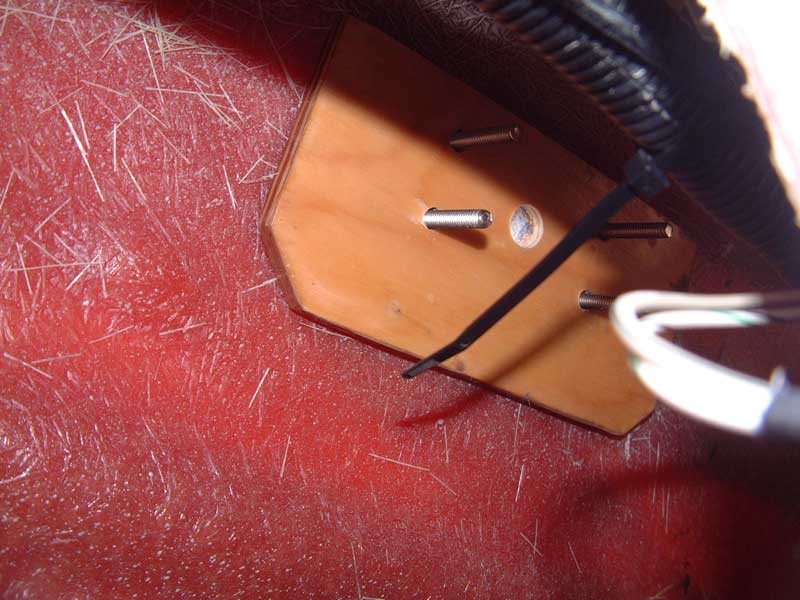
Here's the inside view after all four holes had been drilled, their bolts inserted, and the center hole had been drilled out. The bolts are not straight because they're just sitting in the holes without being tightened down.
As a further precaution against gelcoat cracking, I used a chamfer bit - in reverse, as always - to put a bevel on the edge of each hole. This prevents the surface stress from being applied directly to the vertical walls of the hole itself.
Here's the final result, with the tape removed:
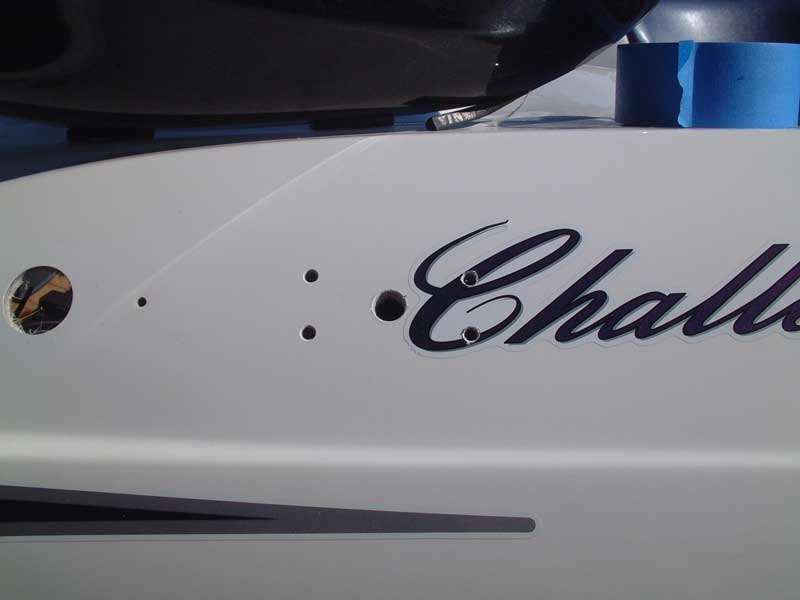
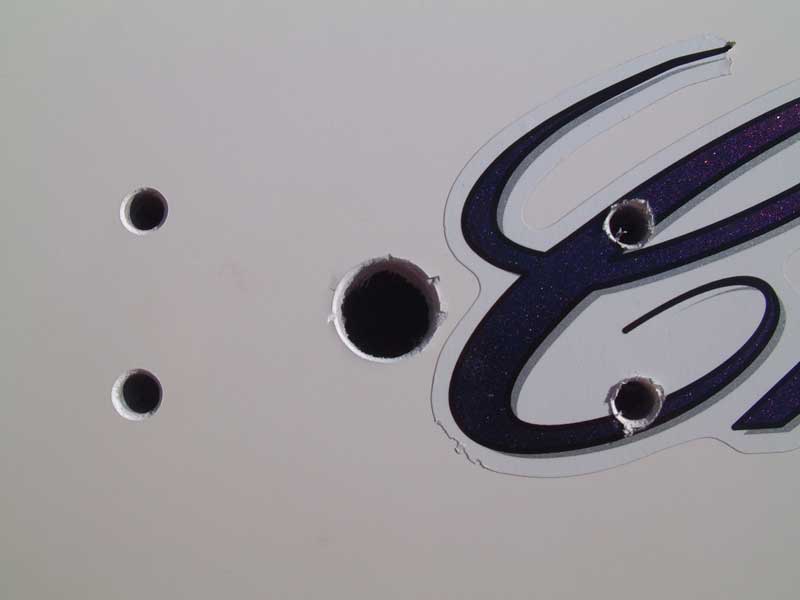
Here's a closeup to show the detail of the holes. Note that despite my being very careful, the large center hole still has some minor gelcoat chipping around its edges. Gelcoat is very unforgiving. The side holes turned out picture perfect, though.
Next I drilled the marine plywood backing plates. Again, I used the mounting base as a template. You can see the marine epoxy, which I put on in several layers without much regard to appearance since they'll probably never been seen again.
Time to install the backing plate. First I did a sanity check to confirm that everything lined up (this is one of my rear backing plates, viewed through the speaker hole):
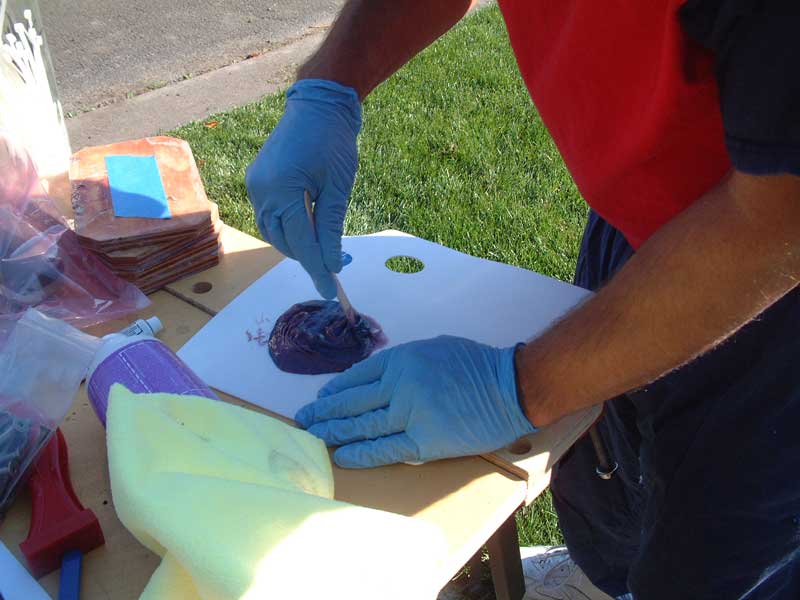
I removed the plate, and mixed up some of the two-part epoxy:
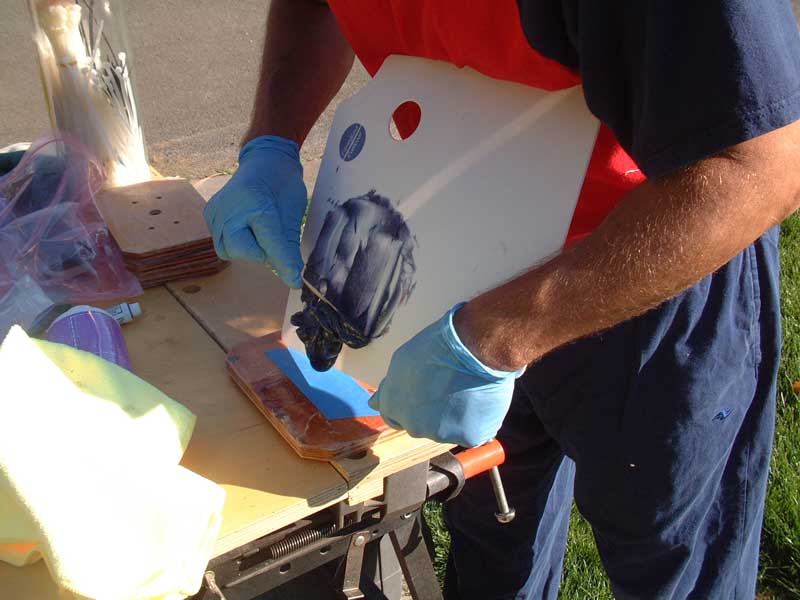
Then I transferred the epoxy to the backing plate. Note that the plate holes were covered by tape. This kept the epoxy from mushing through the holes and forced it to spread out and evenly fill the gap between the backing plate and the hull. Ideally, you'll have some excess epoxy oozing out around the edges of the backing plate to prove that the void has been filled.
Quickly, before the epoxy started to set up, I pressed the backing plate into place behind the holes in the hull. Press firmly (you want the edges to come into contact with the hull) and move it around in a figure-8 pattern to spread the epoxy around evenly between the two surfaces.
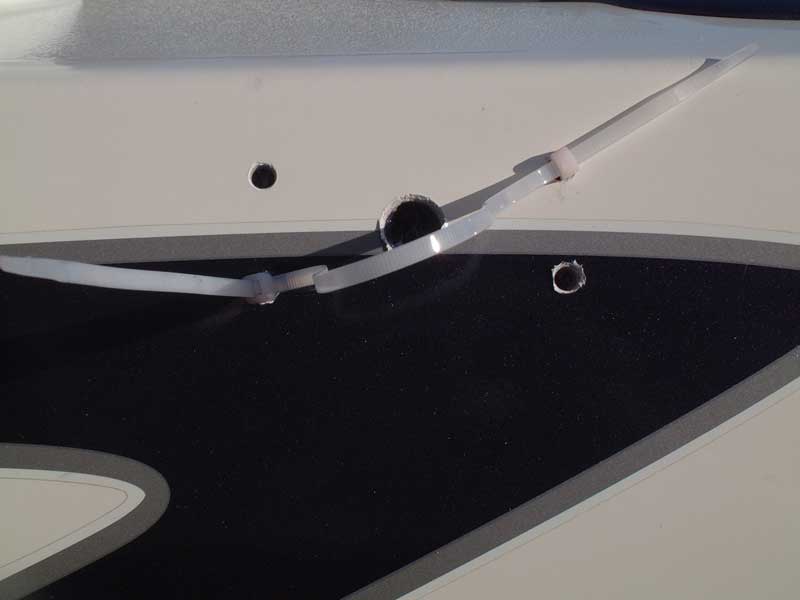
The epoxy hardens quickly so you could just hold it in place by hand. I chose to use tyraps, which I could snug up tight. On this internal view, notice that there was excess epoxy all around the plate as mentioned above:
Here's the external view:
Once the epoxy has hardened, this backing plate is finished. Repeat the process for the other three backing plates.
Everything up to this point has been preparation - strengthening and preparing the boat to have the tower installed. Now the actual Joystick hardware can be mounted.
The mounting bases came first. I used the rubber pads underneath the mounting bases themselves to better acommodate the hull's exterior curvature. I still used Joystick's metal backing plates, but only to better distribute the load to the marine plywood.
I follow Joystick's instructions for mounting the tower itself. I tightened all hardware a little at a time, and was careful not to overdo it. When finished, the interior view of the backing plates looked like this:
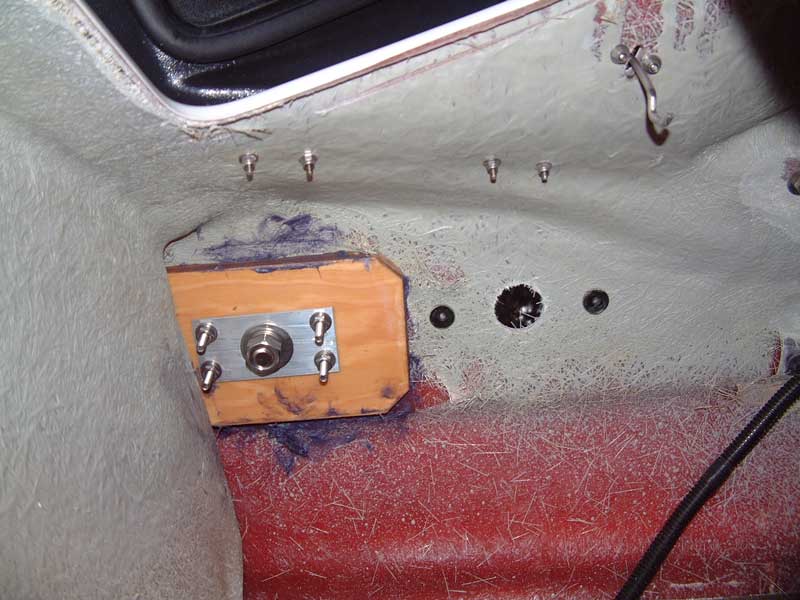
Instead of eight square inches to handle the stress, each corner now had almost 40 square inches of surface area. That entire surface is physically bonded to the fiberglass so that the 40 square inches of marine plywood transfer the stress to a full 40 square inches of hull. This is at least as strong as the "beefed up" fiberglass that wakeboard boats have, and most likely quite a bit stronger. (That marine plywood is tough stuff.) From the exterior, it doesn't look any different... but mechanically this is a much stronger solution which didn't require any more holes than the "standard" approach.
Here are a few views of the finished front mounting point:
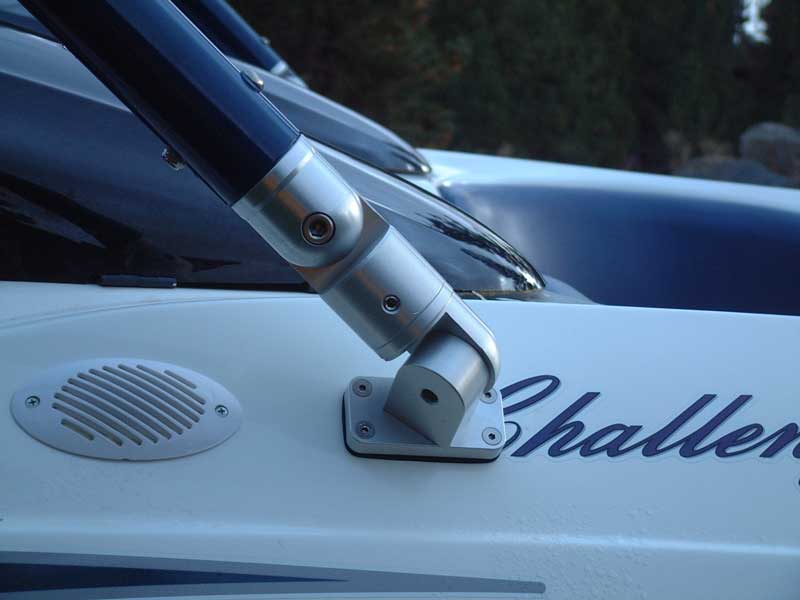
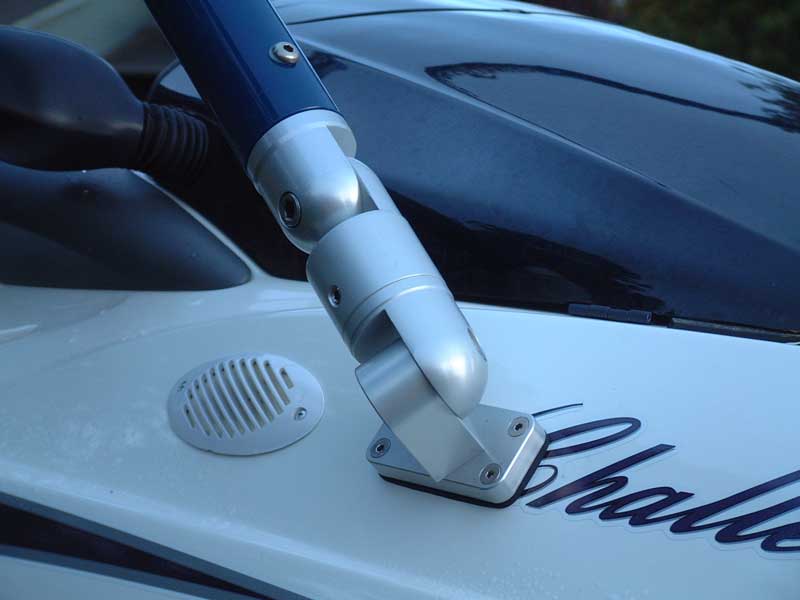
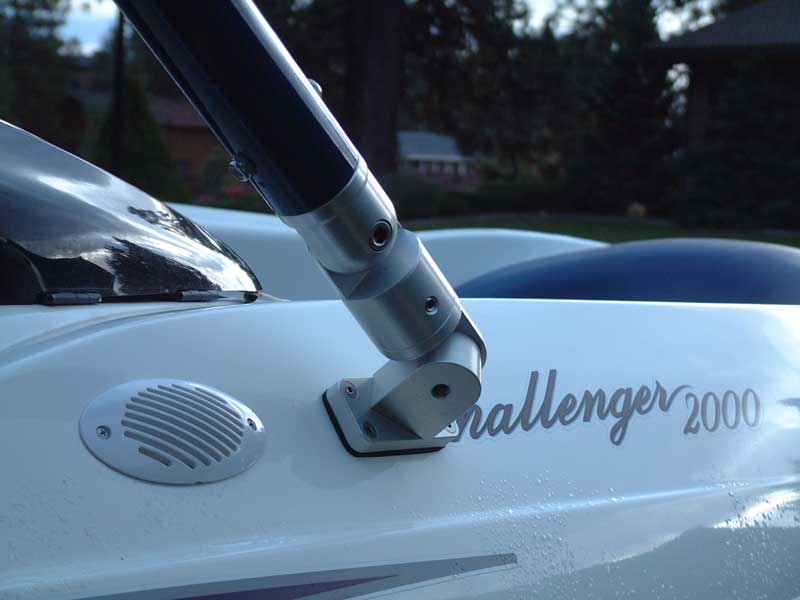
Joystick's in-house machined aluminum hardware is a thing of beauty. It's functionally excellent, giving you all of the flexibility needed to accommodate various mounting points and angles. And in doing so it manages to be gorgeous as well.
Here are a couple of closeups of the finished rear mounting point:
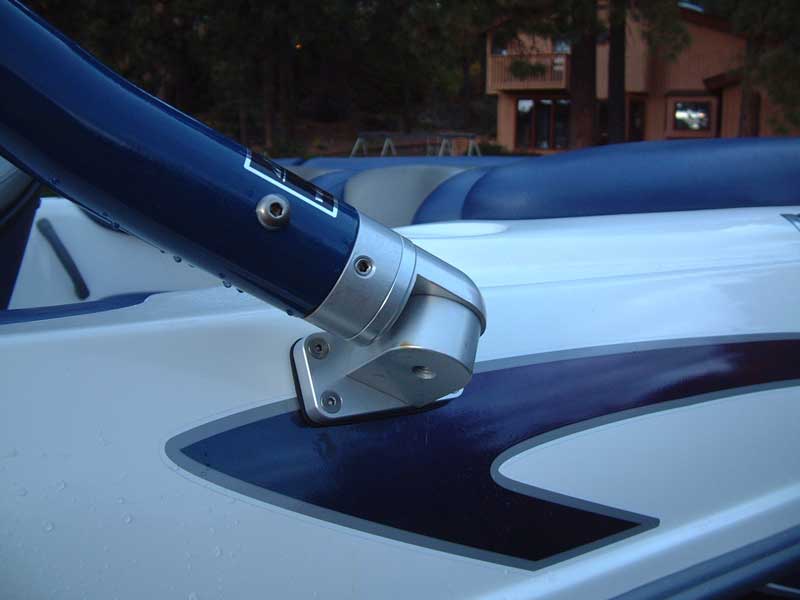
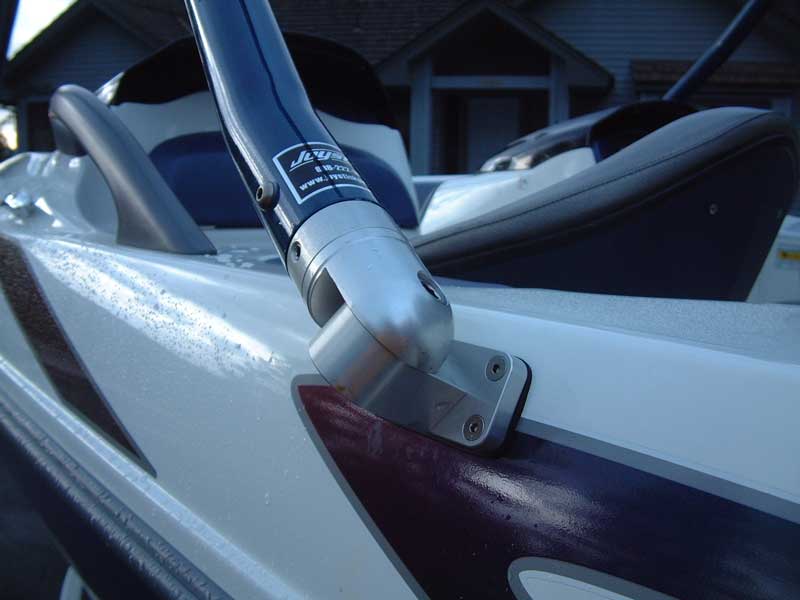
Tube Shape: One thing about which I asked Ron at Joystick was the sharp bend of the rear tubes. I like the look it gives the tower, and I REALLY like how it keeps the tower out of the way of people boarding the boat from the side, but I worried that the tower might flex at that point and eventually develop metal fatigue. Ron assured me they haven't seen that, and further said that the tower is guaranteed for life on that boat so if there ever is a problem they'll replace any required parts. Once it was installed I tested for flex, and it does indeed flex at that point a little bit - there's really no way to prevent it unless the rear tubes are perfectly straight. However, I have to really put some effort into flexing them so I don't think it will be an issue in real life. Furthermore, flexure there means less stress transmitted to the mounting bases and the hull. The number one problem with ALL waketowers is stress transferred to the fiberglass, which can start with spider cracks and lead to severe damage. That's why I made such large backing plates, and I think the slight flex in the rear tubes will dissipate much of the stress in the tower rather than in the fiberglass. Frankly, there is always some stretch in a 60-70 foot rope even if it's Spectra so I don't think the rider will ever feel any difference.
Folding: I don't ever intend to fold mine so this wasn't a big consideration for me. However, the front mounting assemblies are specifically designed to permit folding and I did "use" that feature once during installation. To fold it once it's installed, you'd have to remove two bolts and loosen four others. I'd estimate the total time to do this would be two minutes tops. The front bar would pivot in either direction, and the rear bars would likely just settle down (forward) out of the way. Frankly, mechanical things get weaker every time you loosen/disconnect/disassemble them so my intention is to leave it installed and tightened forever.
Ease of Install: Not bad. I don't expect it's any better or worse than installing anyone else's tower. You're still drilling holes in your boat's fiberglass (yikes!), measuring a lot, that sort of thing. There's nothing specific about Joystick that makes the install any better or worse (and I did review the install instructions on every brand I considered). Obviously I made my installation more complicated by adding the marine plywood backing plates and epoxying them into place, which many people probably wouldn't bother to do.
Bottom Line: I'm really happy having a tower on my boat, and with the Joystick tower in particular. Presales support was excellent and product quality is incredible. Wakeboarding behind a tower is much better than behind a waterski pylon, too, which makes the whole project worthwhile.
Joystick's wakeboard racks are simple, solid, and do their job well. Joystick will include them for no extra shipping charge if ordered with the rack (well worth doing, as the racks are pretty stout).
I wish Joystick made a mirror mount (they say they're working on one), but lacking that option I did some research and decided on one from Samson in Washington State. They will ship it with Ciba's latest, widest mirror and the result is incredible visibility for the driver.
See you on the lake!